How to Embed RealtyVis in WordPress
Are you interested in extending your WordPress website with real estate property search functionality? If you already have a beautiful looking real estate marketing website, you can easily add MLS functionality without installing additional plugins that might not work with your WordPress theme or synchronize thousands of listing data in your WordPress database.
The RealtyVis product suite runs on its own managed cloud-hosted servers and do not incur additional overhead on your server from WordPress plugin installations. There is no need to install any plugins for RealtyVis because it uses the native Custom HTML block which is a standard feature of WordPress.
We will guide you through the process of embedding the powerful RealtyVis property search in WordPress using the Custom HTML block.
1. Obtain the Embed Code
The first step is to obtain the embed code from RealtyVis. Once you’ve signed up for an account, you can copy the HTML embed code for a Map Search Block. The HTML embed code is what allows you to connect your WordPress site with the RealtyVis real estate search.
There are several RealtyVis blocks you can use. At the minimum, you should first add the Map Search block and Listing Detail block to allow your customers the ability to search and view individual listings.
2. Log in to Your WordPress Site
Next, log in to your WordPress site with your admin credentials. From the WordPress dashboard, navigate to the page or post where you want to embed the RealtyVis block. Alternatively, you can create a new page or post specifically for the RealtyVis block.
For example, you can create a new page with the URL https://www.example.com/mls-search for the RealtyVis Map Search block.
3. Add the Custom HTML Block
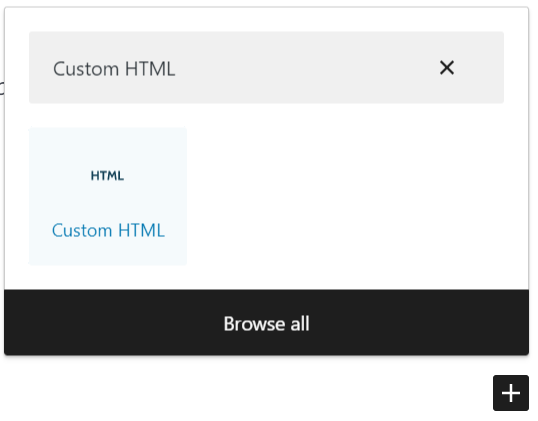
In the editor, click on the “+” button to add a new block. Search for “Custom HTML” in the block search bar, and select the “Custom HTML” block from the results. This will add a Custom HTML block to your page or post.

4. Paste the HTML Embed Code
In the Custom HTML block, paste the HTML Embed Code that you obtained from RealtyVis in Step 1. Make sure to paste it in the HTML editor area of the Custom HTML block.
5. Save and Preview
Click the “Update” or “Publish” button to save your changes. Then, preview the page or post to see how the RealtyVis block looks and functions on your WordPress site.
6. Customize and Test
Depending on the type of RealtyVis block you’ve embedded, you may have additional customization options available such as settings, styling and positioning. Once your page is set up, you can tweak the settings in the RealtyVis Admin to make it flow with your website.
Using the WordPress Custom HTML block is a simple and flexible way to embed a real estate application into your WordPress site without installing additional plugins and messing with your WordPress installation. By following these steps, you can easily integrate RealtyVis and enhance the real estate functionality of your website.